

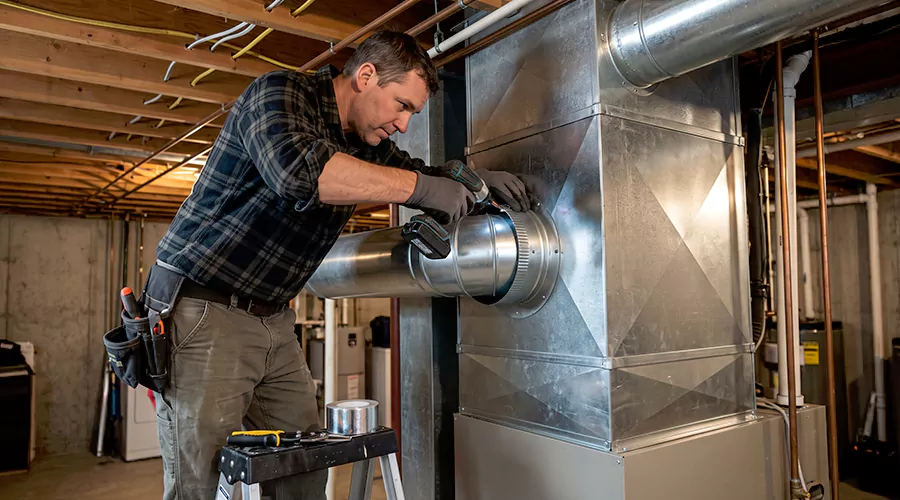
To attach ductwork to a plenum, install a correctly sized takeoff collar or transition fitting, secure it mechanically to the plenum, seal the connection with approved HVAC materials, and attach the duct using the fastening method required for its construction. Flexible ducts need secure inner-liner connections and properly restored insulation, while rigid metal ducts require suitable mechanical joints and sealing. Professional HVAC ductwork installation helps ensure the completed assembly is supported and checked for air leakage and proper airflow.
A plenum is an enclosed air distribution chamber connected to a heating, ventilation, or air conditioning system. A supply plenum receives conditioned air from the furnace or air handler and connects it to the supply ducts. A return plenum collects air from the return ducts and directs it toward the equipment.
Plenums are commonly made from galvanized sheet metal or approved fiberglass duct board. Their dimensions and construction depend on the connected equipment and the amount of air being distributed. A plenum may have several branch takeoffs or connect directly to one main trunk.
Proper duct attachment is important because a poorly connected branch can leak conditioned air or separate over time. Incorrectly sized fittings can also increase resistance and affect room airflow. Every connection should be installed as part of a designed distribution system rather than simply attached wherever space is available.
What Is an HVAC Plenum?
An HVAC plenum is a distribution or collection chamber that connects the air-moving equipment to the duct network. It provides a suitable location for transitions and duct connections. Its shape and size should match the equipment and airflow requirements of the system.
There are two main types of plenums in conventional forced-air HVAC installations.
Supply Plenum
The supply plenum is connected to the conditioned-air discharge side of a furnace or air handler. It distributes air to main supply trunks or directly connected branches. Depending on the design, it may contain several takeoff collars.
Supply plenums must accommodate the required airflow without creating excessive resistance. A very small or poorly shaped plenum can affect how air enters the connected ducts. Branch positions and fitting sizes should be selected through appropriate duct design.
Return Plenum
The return plenum collects indoor air from one or more return ducts and directs it toward the furnace or air handler. It may connect to a filter cabinet or another approved return assembly. Its purpose is to provide a suitable pathway for air entering the blower.
Return plenums should be airtight. Openings can draw air from equipment closets, attics, or crawlspaces instead of the intended rooms. These leaks can introduce unwanted dust or temperature differences into the HVAC system.
What Types of Ductwork Can Attach to a Plenum?
Several duct materials can connect to a plenum when the fittings and design are suitable. The connection method depends on whether the duct and plenum are constructed from metal, flexible material, or fiberglass duct board.
| Duct Type | Typical Plenum Connection | Main Requirement |
|---|---|---|
| Round sheet metal duct | Round takeoff collar or spin-in fitting | Mechanical fastening and air sealing |
| Rectangular metal duct | Rectangular opening and approved connection flange | Secure joint and suitable sealing |
| Insulated flexible duct | Beaded round takeoff collar | Inner-liner fastening, sealing, and insulation |
| Fiberglass duct board | Approved duct board transition or fitting | Manufacturer-specific attachment and sealing |
| Main supply trunk | Suitable plenum transition | Correct dimensions and independent support |
| Main return duct | Approved return connection | Airtight joint and adequate return capacity |
Duct materials are not necessarily interchangeable. A flexible branch requires a suitable collar and support arrangement, while a rectangular metal trunk may connect through a fabricated flange or transition. The selected fitting must match both the plenum construction and the required airflow.
What Materials Are Needed to Attach Ductwork to a Plenum?
A plenum connection requires suitable fittings and fastening materials. The exact components depend on the duct type, size, and the material used for the plenum. A professional installer should identify these products before making openings.
| Material or Tool | Purpose |
|---|---|
| Correctly sized takeoff collar | Connects round duct to the plenum |
| Rectangular transition fitting | Connects rectangular duct or trunk |
| Approved sheet metal screws or fasteners | Secures applicable metal connections |
| Mechanical drawbands | Attaches nonmetallic flexible duct liners |
| Compatible drawband tensioning tool | Tightens approved flexible duct fasteners |
| UL 181-compatible duct mastic | Seals suitable HVAC joints |
| Listed HVAC closure tape | Seals compatible connections |
| Approved duct board fasteners | Attaches fittings to applicable duct board |
| Fiberglass mesh reinforcement where specified | Reinforces compatible sealed joints |
| Proper hangers and supports | Carries duct and fitting weight |
| Insulation and vapor-barrier materials | Restores thermal and moisture protection |
| Suitable measuring and cutting tools | Prepares properly sized openings |
The Air Duct Council identifies UL 181B-listed closure products for applicable flexible duct connections. Other materials may have different listing requirements. Product instructions should be followed rather than substituting ordinary household tapes or fasteners.
How Do You Determine the Correct Plenum Connection Size?
The connection size should be based on the amount of air the attached duct must carry. The required airflow depends on the room loads, the HVAC equipment, and the distribution layout. A takeoff collar should not be selected solely because its diameter is convenient.
ACCA Manual D provides recognized residential duct design methods. These calculations consider the effective length of each duct and resistance through fittings. The connection at the plenum contributes to that resistance.
A contractor should evaluate the total airflow distributed by the plenum and the requirements of each branch. Adding several outlets to an undersized distribution box can create uneven airflow and excessive pressure loss. A proper layout may require a larger plenum, additional trunk sections, or different connection locations.
The return system should be evaluated separately. An undersized return connection can restrict airflow through the entire HVAC system even when the supply branches are adequate.
How to Attach Ductwork to a Plenum Step by Step?
The procedure below describes how a qualified HVAC installer attaches a typical residential supply or return duct to an approved plenum. The methods vary according to the construction materials and whether the work involves a new branch or an existing connection. The equipment manufacturer's instructions and locally adopted mechanical requirements should govern the installation.
Step 1. Identify the Plenum Type
Determine whether the work involves a supply plenum or return plenum. Inspect its connection to the furnace or air handler and identify existing trunks, branches, and fittings. A supply duct should never be attached to a return plenum merely because a convenient opening is available.
The plenum's location within the system affects both the required connection size and its sealing requirements. The installer should understand the intended airflow direction before beginning work.
Step 2. Inspect the Plenum Material
Identify whether the plenum is constructed from sheet metal, fiberglass duct board, or another approved product. Check the material for damage, moisture, and existing loose joints. A weakened plenum may need repair before another duct can be attached.
Metal and fiberglass duct board require different fastening methods. Screws and fittings that work with metal may not be appropriate for a duct board connection. Use the manufacturer's specified attachment products.
Step 3. Confirm the Airflow Design
Determine the amount of air the new duct is intended to carry. The equipment must have sufficient airflow capacity to serve the existing branches and any new connection. Duct dimensions should be calculated rather than guessed.
If the work involves adding a new supply branch, consider its effect on the existing rooms. A system with excessive static pressure may need a different solution before new ductwork is added. The contractor should evaluate the complete distribution network.
Step 4. Select the Connection Location
Choose a connection point on the plenum according to the duct design and available installation space. Avoid placing a fitting where it interferes with existing branches, access panels, or structural supports. The location should provide enough clearance to install and service the connection.
The fitting position may affect airflow resistance and distribution. A new opening should not be created arbitrarily next to a major obstruction. A qualified designer should establish suitable takeoff positions when several branches share one plenum.
Step 5. Select the Correct Takeoff or Transition
Choose a fitting that matches the intended duct and plenum material. Round branches commonly use approved collars, while rectangular ducts may need fabricated connection flanges. Flexible ducts typically connect to collars with raised retaining beads.
The fitting must also be compatible with the required airflow and operating conditions. An incorrectly sized transition can create a restriction even when the duct farther downstream is adequate. Avoid forcing incompatible parts together.
Step 6. Check Safety and Equipment Access
Turn off the HVAC system before opening the plenum. When work occurs near the furnace or air handler, qualified personnel should follow the appropriate electrical and mechanical isolation procedures. The blower should remain off while the air distribution system is open.
Identify nearby electrical wiring, refrigerant tubing, drain lines, and equipment service panels. Do not cut into an area where a concealed component may be damaged. Fuel-burning furnace exhaust ducts must remain separate from ordinary supply and return air connections.
Step 7. Mark the Connection Opening
Position the fitting against the plenum and mark the required opening according to its installation instructions. The opening should match the fitting rather than be cut oversized. A poorly sized hole can weaken the attachment and leave gaps that are difficult to seal.
Before cutting, confirm that the proposed opening does not conflict with an existing fitting or internal component. The plenum should remain structurally sound after the connection is added.
Step 8. Prepare the Opening
For a sheet metal plenum, use suitable tools to create the designed opening. Remove sharp burrs that could damage the attached duct or interfere with the fitting. Prevent cutting debris from entering the air handler or surrounding ducts.
Fiberglass duct board requires a different cutting and attachment procedure. The exposed edges and facing should be prepared according to the material manufacturer's instructions. Aggressive cutting or unsupported fittings can damage the board.
If the plenum contains deteriorated insulation or other suspicious material, investigate before disturbing it further.
Step 9. Install the Takeoff Collar
Position the approved takeoff fitting in the prepared opening. A metal collar may include tabs, a flange, or another mechanical attachment system. The contractor should install the fitting using the method specified for the product and plenum construction.
The collar must remain secure and correctly aligned. It should not rock or pull away when the branch is positioned. Mechanical support is especially important when the connected duct is large or heavy.
For duct board plenums, use fittings designed for that material. A collar that is poorly secured can tear the board and create persistent leakage.
Step 10. Seal the Collar-to-Plenum Joint
Apply approved HVAC mastic or a compatible listed closure system around the appropriate collar-to-plenum connection. The seal should bridge the joint so conditioned air cannot escape through the opening. The fitting must already be mechanically secure.
The U.S. Department of Energy recommends sealing metal duct joints and branch takeoff connections using suitable mastic. Wider gaps may require appropriate reinforcement rather than a thin layer of sealant alone. The sealing method should follow the product's instructions.
Check the joint before covering it with insulation or attaching surrounding materials.
Step 11. Prepare the Duct End
The next steps depend on whether the attached duct is rigid metal or flexible material. Rigid metal ducts need suitably formed connection ends. Flexible ducts require their insulation and exterior jacket to be moved back so the inner liner can be secured separately.
Inspect the duct end for deformation and damage. A crushed or torn section should not be installed merely because its nominal dimensions match the fitting. Correct preparation helps the connection remain airtight.
Step 12. Attach Rigid Metal Ductwork
Fit the rigid metal duct over or into its designated transition according to the fitting design. Secure the connection using the specified mechanical fasteners, which may include sheet metal screws or other approved joint systems. Proper support should hold the duct in alignment.
Seal the appropriate rigid joint using compatible HVAC mastic or listed closure products. The Department of Energy's metal duct guidance describes mechanical attachment followed by sealing of joints and seams. Avoid using ordinary cloth-backed tape as the permanent closure.
For a large rectangular trunk, a fabricated flange or transition may be more appropriate than a simple round collar. The fitting must remain stable under normal system operation.
Step 13. Attach Flexible Ductwork
For a nonmetallic insulated flexible duct, pull back the insulation and outer jacket to expose the inner liner. Slide the liner over the approved beaded collar as specified by the manufacturer. Secure it with a suitable drawband and tensioning method.
The Air Duct Council advises against using screws to attach ordinary nonmetallic flexible cores because they may damage the liner. Use fasteners compatible with the product. The connection should remain secure without crushing the inner passage.
Step 14. Seal the Flexible Inner Liner
Apply compatible UL 181B-listed duct mastic or another approved closure system at the flexible inner-liner connection. The Department of Energy's illustrated method uses mastic across the mechanically fastened liner and metal collar. The seal should be continuous around the joint.
Do not rely solely on securing the outer jacket. The inner liner is the air-carrying part of the duct. A loose inner connection can leak beneath insulation that appears undamaged.
Step 15. Restore the Flexible Duct Insulation
Bring the insulation over the fitting and join it to the adjacent insulated surface where applicable. The insulation should cover the metal connection without leaving significant gaps. Avoid compressing it with an overly tight strap.
The exterior jacket should then be sealed using compatible approved materials. Its protective and vapor-barrier function is particularly important when the duct operates in an unconditioned attic or crawlspace. A gap in the jacket can expose the insulation to moisture.
Step 16. Support the Attached Duct
Install appropriate supports so the new branch does not pull against the plenum connection. Rigid metal trunks require hangers suited to their size and weight. Flexible ducts need supports that preserve the intended diameter and avoid excessive sagging.
Department of Energy guidance recommends typical horizontal flexible duct support intervals no greater than four feet, using straps at least 1.5 inches wide. Supports should also be installed near bends and connection points as needed. A branch should not leave the plenum and immediately make a sharp unsupported turn.
A substantial trunk may require independent support close to the plenum. Mechanical fastening alone should not be expected to carry its entire weight.
Step 17. Insulate Metal Ducts and Fittings
Where insulation is required, cover the new metal duct and applicable plenum fittings after the joints have been sealed. The insulation rating should meet local energy-code requirements. A continuous thermal covering helps reduce unwanted heat gain or loss.
Insulation should not be compressed excessively or leave large gaps around connections. Vapor protection may also be needed to reduce condensation risk. The correct method depends on whether the duct is inside conditioned space or an unconditioned area.
Step 18. Inspect the Entire Plenum
Check the original plenum seams and the connection between the plenum and HVAC equipment. Adding a branch can disturb nearby joints, especially when an older plenum lacks adequate support. Examine all accessible seams for openings or damaged sealant.
The Department of Energy specifically recommends sealing fixed joints between the air handler or furnace cabinet and its plenums. A well-sealed new branch cannot eliminate leakage at an unrelated plenum seam. The full distribution connection should remain sound.
Step 19. Restore HVAC Operation
Confirm that all ductwork is mechanically secure and that equipment panels are correctly installed. Restore operation using the equipment's prescribed startup procedure. Check whether the new duct delivers air to its intended location.
Listen for excessive noise or vibration near the plenum connection. A poorly fitted transition may create unwanted airflow noise. The contractor should investigate any new operating problem before completing the project.
Step 20. Perform Leakage and Airflow Verification
A professional duct leakage test can identify openings at the new fitting and surrounding connections. The contractor may also measure register airflow and system static pressure to determine whether the modified system performs properly. These checks are particularly important when the new connection changes the distribution network.
If existing rooms receive less air after a new branch is added, further balancing or design corrections may be necessary. The work should be evaluated as part of the complete HVAC system. A successful connection is mechanically secure, airtight, and compatible with the intended airflow.
How to Attach Flexible Ductwork to a Metal Plenum?
Flexible ductwork attaches to a metal plenum through a suitable beaded takeoff collar. The collar is mechanically secured to the sheet metal and sealed around its base. The flexible inner liner is then placed over the collar and fastened with an approved drawband.
Apply compatible sealing material at the inner liner connection. Afterward, restore the insulation and exterior jacket over the fitting. Support the flexible branch so it does not pull away from the plenum or develop a sharp bend.
The position of the takeoff should follow the airflow design. Placing several flexible branches too close together or adding outlets without evaluating the equipment can create distribution problems.
How to Attach Rigid Metal Ductwork to a Plenum?
Rigid ducts connect through approved fittings or transitions that match the plenum dimensions. A round metal branch may use a suitable collar, while a rectangular trunk may require a fabricated flange. The connection should provide a stable mechanical joint.
The installer should use approved fasteners and seal the seam with compatible HVAC mastic or listed closure materials. The duct also needs adequate support, especially when it carries substantial weight. The plenum wall should not be deformed by the connected passage.
For larger transitions, the fitting shape can influence airflow resistance. A well-designed transition is preferable to an abrupt improvised reduction.
How to Attach Ductwork to a Fiberglass Duct Board Plenum?
Fiberglass duct board requires connection methods suited to the board's structure and facing. Specialized collars and fastening systems may be needed to prevent damage around the opening. The manufacturer should identify how fittings are secured and sealed.
The Department of Energy's Building America guidance discusses suitable duct board connections using approved closure tape, mastic, and reinforcement methods. These connections should be completed without crushing the board or damaging its facing. The exposed edges should remain properly protected.
A large or heavy duct may require additional independent support. The fiberglass plenum wall should not carry the entire load of the attached duct. Damaged or wet duct board should be evaluated before another fitting is installed.
Can You Connect Multiple Ducts to One Plenum?
Yes. A supply plenum can serve multiple branches when it is designed to distribute the required airflow. The branches should have appropriate sizes and fitting locations. The plenum itself must also have sufficient capacity.
However, adding more takeoffs does not increase the heating or cooling equipment's capacity. The new branches draw from the airflow available within the system. If the distribution network is already restrictive, additional connections can reduce airflow to existing rooms.
A qualified HVAC designer should evaluate the total airflow and pressure requirements. A distribution box with many connections may require a different layout or larger main duct arrangement.
Can You Attach a Return Duct to a Supply Plenum?
No. Supply and return plenums serve opposite sides of the forced-air circulation system. A supply plenum distributes conditioned air to rooms, while a return plenum directs room air back toward the equipment.
Connecting a return duct to a supply plenum would create an incorrect airflow path. Similarly, a supply duct attached to a return plenum would not deliver conditioned air to the intended rooms. The system design must keep the two networks correctly connected.
Return plenums also require attention to filtration and prohibited return-air locations. Their installation should follow applicable equipment and mechanical-code requirements.
How Do You Seal a Plenum Connection?
The sealing method depends on the duct and plenum materials. Rigid sheet metal joints commonly use HVAC mastic or listed closure products after suitable mechanical fastening. Flexible duct connections require a separate inner-liner attachment and seal, followed by restoration of the outer insulation and jacket.
For fiberglass duct board, the approved closure method may involve listed tape, compatible mastic, and reinforcement. The material's facing must remain suitable for sealing. Damaged or loose components should be repaired mechanically rather than hidden beneath sealant.
The U.S. Department of Energy recommends checking all accessible plenum seams and the cabinet-to-plenum joint. Air can escape through those areas even if the new branch connection is tight.
Should a Plenum Be Insulated?
Plenum insulation depends on the equipment configuration and location. A plenum installed in an unconditioned attic or crawlspace may require substantial thermal insulation under the applicable energy code. A plenum located inside conditioned space may have different requirements.
Cooling plenums also need appropriate condensation protection. Bare metal exposed to humid air can develop condensation when its surface temperature falls below the surrounding air's dew point. Proper insulation and vapor protection can reduce this risk.
A contractor should follow the equipment manufacturer's requirements and locally adopted energy code. Insulation should not cover required access points or interfere with equipment service.
What Mistakes Should You Avoid When Attaching Ductwork to a Plenum?
Plenum connections affect how air enters and leaves the distribution system. Incorrect sizing and weak attachments can create restrictions or leakage that affect several rooms. The installation should be inspected before insulation or other construction makes the joints difficult to reach.
Avoid these mistakes:
- Cutting a plenum opening without checking the duct design.
- Installing a takeoff collar with the wrong diameter.
- Attaching supply ducts to the return side.
- Failing to mechanically secure a connection fitting.
- Leaving the collar-to-plenum joint unsealed.
- Securing only the exterior flexible duct jacket.
- Using screws through nonmetallic flexible liners without approval.
- Using ordinary cloth-backed tape for permanent duct sealing.
- Connecting a heavy trunk without independent support.
- Allowing a flexible branch to bend sharply at the collar.
- Compressing insulation around the joint.
- Leaving the exterior vapor barrier open.
- Attaching fittings to deteriorated duct board.
- Blocking HVAC equipment access.
- Adding branches without checking blower and trunk capacity.
- Failing to inspect the plenum-to-equipment connection.
- Skipping leakage and airflow testing when the system has been modified.
A suitable fitting should become part of a stable and airtight distribution network. Fixing only the appearance of a joint will not correct a poor mechanical attachment or an inadequate airflow design.
Can You Attach Ductwork to a Plenum Yourself?
Some experienced homeowners may be capable of limited repairs to accessible connections using approved materials. However, adding new takeoffs or modifying a major trunk affects the entire air distribution system. The work should be sized correctly and may require permits or performance testing.
Work near air handlers and furnaces can also involve electrical components, sharp sheet metal, and combustion safety considerations. A professional HVAC contractor is generally recommended for new plenums and substantial branch modifications.
A qualified installer can verify the connection and determine whether the equipment remains within its intended airflow and static pressure limits.
How Can You Keep Plenum Connections in Good Condition?
Regular HVAC maintenance can include inspection of accessible plenum seams and branch collars. A loose fitting should be corrected before vibration or duct movement causes further separation. Damaged insulation and exposed jacket seams should also be repaired promptly.
Keep duct supports in place so branches do not place unnecessary stress on their connections. When other trades work in an attic or basement, they should avoid stepping on ducts or moving the trunk assemblies. Disturbed fittings may need inspection afterward.
Maintaining appropriate filters and return-air pathways also supports normal HVAC operation. However, filtration cannot correct mechanical leakage at a plenum seam. Airtight construction remains necessary.
Conclusion
Attaching ductwork to a plenum requires a correctly sized fitting, secure mechanical connection, compatible air sealing, and suitable support. Flexible ductwork must be fastened at its inner liner before the insulation and exterior jacket are restored. Rigid metal ducts require appropriate joints and fasteners, while fiberglass duct board needs material-specific connection methods. The plenum and connected ducts should be designed for the HVAC equipment's airflow requirements. After installation, inspect the complete assembly and verify that it operates without significant leakage or restrictions.